Showing posts with label chocolate. Show all posts

Monday, 11 February 2013

Valentine's Chocolate Bouquet


Valentine's Chocolate Bouquet


I made this chocolate monstrosity for Rich and it was supposed to be for Valentine's Day but due to the unexpected snow flurry he was working from home this afternoon and he's already seen it. Oops! Still, it means I can do this blog a bit earlier.

We don't usually bother with Valentine's Day and never get each other cards let alone gifts. There's only 4 weeks between mine and Rich's birthdays and Valentine's is right in the middle so it's not really something that we feel the need to celebrate. But I've wanted to make a chocolate bouquet for ages so Valentine's is the perfect excuse. 

To make this bouquet you'll need a few simple pieces of kit.


I used a cylindrical gift box that I got from The Card Shop, wooden garden cane from Wilkinsons and some oasis (usually used by florists) from Hobbycraft. I also used some flower themed cupcake wrappers from Cakes Cookies and Crafts. I had everything apart from the container already lying around the house and if you don't want to have to go to several shops there are other things you can use. Kebab skewers instead of garden cane, polystyrene instead of oasis and the cupcake wrappers are entirely optional. There are a lot more options for the container - vases, gift bags, bowls etc.  

You'll also need some goodies. I picked up some of Rich's favourite chocolates but I also got a marshmallow Me to You bear lolly because I thought it was a nice addition to the Valentine's theme. 
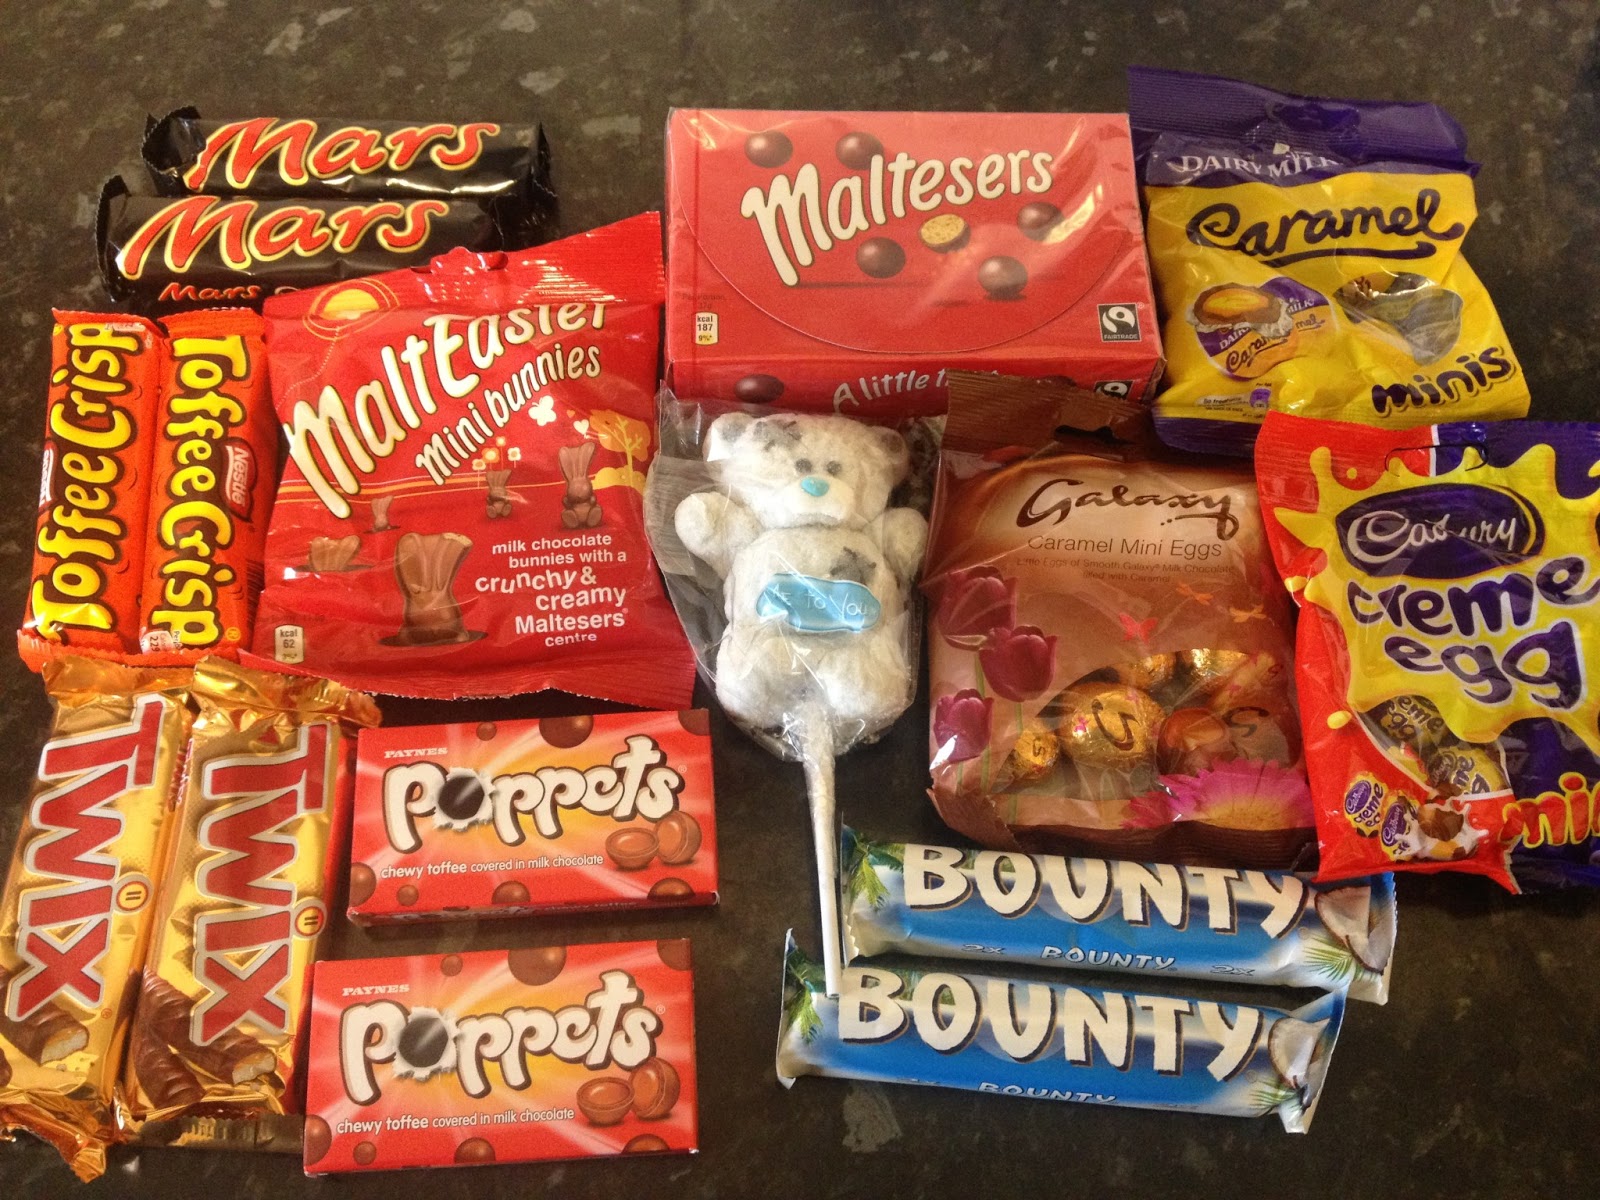

Additional items needed are sellotape and something to cut your rods - I used secateurs. You can also add some decorations, I used a piece of shredded tissue paper to cover up the oasis and these cute heart picks I got from the 99p Store. 


Here comes the science.

Step 1

Put the oasis inside your container. Cover up with shredded tissue paper if desired.

Step 2

Push your rod through a cupcake wrapper like this. If you're not using cupcake wrappers then just skip this step. Pull the wrapper down to the bottom of the rod ready for the next step. 


Step 3

Secure a chocolate bar to the rod using a couple of strips of sellotape on the back. You could use glue but it's a lot messier and if you use tape you can easily remove the chocolate when it's time to eat it. 


Step 4

Pull up the cupcake wrapper so it sits underneath the chocolate bar like petals. 


Step 5

Insert your rods into the oasis. You'll want the chocolates to be at different heights so you can cut your rods down to size. I found it easier to put the rods into the oasis first to judge how much I needed to cut off. Play around with the arrangements until you find something you like. 


Step 6

Keep adding the rest of your chocolate until you're happy with how everything looks. It doesn't matter if you don't use everything you've bought. I ended up with a spare Toffee Crisp and box of Malteasers. They're unlikely to survive the rest of the week. Yum. 

Step 7

Add some decorations. I used the felt and glitter hearts but you can use anything your imagination can think of. Fresh flowers, ribbons, feathers - whatever you like. 


Step 8

You could finish things at step 7 but I do like to go over the top whenever I can so I tied on some bags of chocolates onto the base. Voila - a completed bouquet. 


While you're making this you'll have to be careful that the whole thing doesn't topple over. Keep the rods as short as possible and every time you add a chocolate, put the next one on the opposite side to balance things out. Once it's completed it will be stable, it's just during the creative process you'll need to watch out. This project is incredibly easy and only took me an hour. Chocolate bouquets cost an absolute fortune in the shops, similar ones online with the same amount of sweets are over £30 and that's without postage. And, perhaps best of all, there's no way one person can eat that much chocolate on their own so they'll have to share - huzzah!

Sunday, 16 September 2012

Oreo Truffle Bites


Oreo Truffle Bites

I recently made some brownies with a layer of Oreo truffle on the top. The amount of questions I got about the truffle bit was insane. This week alone three of my friends have made them and others are planning on giving them a go. I figured I should do a more detailed blog concentrating just on the truffle recipe, so I have. In my original recipe I used a mixture of chocolate spread and cream cheese to make the truffles but this time round I've stuck with just the chocolate spread. 

As you can see from the picture above I have decorated mine with some milk chocolate. You can use absolutely anything your heart desires. If you're a sprinkles fan you can shake some over while the chocolate is still wet, you could roll them in coconut flakes, dust them with edible glitter, top them with Oreo crumbs, add some popping candy... the possibilities are limitless. 

Here comes the science.

Ingredients.

2 packets of Oreos
1 packet of SilverSpoon white chocolate cake covering
Chocolate spread, Nutella or Cadbury is fine
Petit Four cases (not strictly an ingredient!)


Break the Oreos into a food processor. Keep back 2 or 3 cookies just in case the mixture goes too wet when you add the chocolate spread. If you don't need them I'm sure you can find some other use for them *stuffs left over Oreo into mouth*


Blitz the broken Oreos until you get some really fine crumbs.


Now add two heaped tablespoons of chocolate spread. This will not be enough to finish the mixture but it's just to get it going.


You should get something that looks like this.


As you can see it's still dry and crumbly. You need to add more chocolate spread in small amounts until the mixture comes together into a shiny dough. If the dough becomes too wet you won't be able to make truffle shapes out of it which is why having a couple of spare back up cookies is a good idea. If you need to use them bash them with a rolling pin a few times to break them up and add them to the mixture.


Once you have your shiny, smooth dough you can start making truffles. Place a piece of greaseproof paper onto a tray. Roll chunks of dough into balls and set them on the tray to rest. I'm sure you'll do a better job than I did at getting them all the same size. Oops!


Keep going until all the mixture is gone. Put the tray in the fridge for 30 minutes to firm up the truffles as they'll be easier to coat in chocolate. 


Melt your chocolate however you want. I prefer to do mine in a glass bowl in the microwave by blasting the chocolate in 25 second batches, stirring and then repeating until it has all melted. You could of course melt yours in a double boiler on the stove top. Dip the truffles in chocolate one at a time and roll them around to get an even coating. Let as much chocolate drip off as possible over the bowl and then put them back on your paper covered tray. If you put them down with one swift movement and don't let them move around on the paper your puddle of chocolate under the truffle will be smaller and neater. I used two teaspoons to get them in and out of the chocolate. Remember, if you're using sprinkles or want something to stick to the outside of the truffles you need to put it on while the chocolate is still wet. If you're decorating them with more chocolate you can leave them to set while you get on with coating the others. 


I decided to use up some left over milk chocolate to decorate mine. I melted it and used a small piping bag to drizzle the chocolate over the top of the truffles. Then I put them into colourful petit four cases. 


I'm taking these truffles to work so to safely transport them there I've lined a cake box with some purple tissue paper and lined them up neatly. I think they look great in this box and they've come out better than expected. 


These truffles are so easy and quick to make and there isn't really a wrong way of doing them. If your mixture isn't smooth then it doesn't matter, I think getting a little crunchy bit of Oreo inside would be an extra treat. Since no baking is involved they'd be a great thing to do with your kids because they can get involved. Obviously they wouldn't be able to use the food processor but if you transfer the dough to a separate bowl they can get stuck in with both hands making shapes and covering them in chocolate. Perfect messy fun for a weekend afternoon. They're relatively cheap to make too. The Oreos and chocolate cost less than £3 and by the time you add in a few spoonfuls of chocolate spread, petit four cases and some sprinkles you'll still have change from a fiver and you'll have 30 truffles out of it!

Here are some of the fabulous truffles my friends made this week.


Made by the Emma. Follow her here on Twitter. They look ace, who can resist sprinkles?!


Made by Sam. Follow her here on Twitter. What a great idea for a thank you gift, wouldn't you love to receive a little bag of these?


Made by Charley. Follow her here on Twitter. Making them into lollies is nothing short of genius.

If you make some of these truffles, let me know and I'll add your photo to the little gallery of delicousness I've got here!


Thursday, 6 September 2012

Oreo Truffle Marshmallow Chocolate Brownies


Oreo Truffle Marshmallow Chocolate Brownies

I'm going to a party at the end of the month and I've promised to bring some baked goods. The host isn't keen on buttercream and I needed something that travels well as the event is in London. Brownies are one of the most robust things I could think of and the birthday boy is an Oreo fan and thus these creations were born. The pictures are from a practice run I did yesterday.

You will need the following ingredients (plus some butter that I foolishly forgot to include):


To make the brownies:

100g cocoa
500g caster sugar
100g self-raising flour
250g butter
4 beaten eggs
1 tsp vanilla extract

Preheat your oven to 180 degrees and line a small brownie tin.
Melt the butter in the microwave if you're impatient or in a saucepan.
Off the heat mix in the cocoa and sugar and stir until dissolved.
Add the eggs one at a time and mix until dissolved.
Finally, stir in the flour.
Transfer to your brownie tin and bake for 30 minutes.
After 30 minutes put a piece of greaseproof paper or silver foil and on top of the brownie to stop the edges burning and bake for another 10-15 minutes. 
Test whether it's cooked by inserting a skewer and then leave to cool.


Of course, if you've got a favourite brownie recipe you can use that, anything will do! I took the brownie out of the pan and removed the greaseproof paper and then put the brownie back before doing the next steps.

To make the Oreo truffle:

20 Oreo cookies
1.5 tablespoons chocolate spread
1.5 tablespoons cream cheese

Crush the cookies in a food processor.
Add the chocolate spread and cream cheese and blitz.


The idea is to make a dough-like truffle consistency. If it's too wet you can add some icing sugar to bring it back, if it's too dry just add a little more cream cheese. It should be glossy and spreadable when you're finished. This stuff would be amazing just rolled into balls and coated with popping candy or coconut. I'm thinking of making some cakepops using this mix. If you don't have a food processor you can crush the cookies in a sandwich bag by bashing them with a rolling pin. It'll take longer and won't be as smooth but it'll be just as tasty.


When the brownie is completely cool spread the truffle mix on the top. You'll need to score a few lines on and make some dimples in it because marshmallow Fluff will stick to carpets, skin, dog fur and jeans but it seldom sticks to cake. I speak from painful experience. I once filled a cake with Fluff and when I checked on it a few hours later it had created a hole in the frosting and oozed out down the side. There were tears in the kitchen that day.


Now you need to add the Fluff. Because it is an unruly beast and will try to make an escape, you don't need to pour loads on. I used just under half a jar. I didn't have any problems with it running out after the brownies were cut with this amount. Also, Fluff is really sweet and these brownies don't need much help in the sugar department! If you accidentally mix in a bit of the truffle (like I did as you'll see from the photo below) it doesn't matter so don't worry.


Now you need to get the chocolate topping ready. Either melt it in a bowl over a pan of water or give it short bursts in the microwave. I always use the microwave because it's easier, cleaner and quicker. I would recommend SilverSpoon cake covering for things like this because it melts into a gloriously runny liquid making coverage so easy. Score the surface of the Fluff before you pour to help the chocolate stick to it and hold it in place. The chocolate needs to be room temperature before you start otherwise it'll upset the Fluff. I used half a bar of chocolate for this.


Now, what I should have done is add the crushed Oreos while the milk chocolate was still wet but being a domestic goddess (*cough*) I was making a carbonara at the same time and forgot to do this so I had to improvise. 

I chopped the Oreos into little wedges and crumbs.


I then drizzled melted white chocolate all over the top of the brownies and scattered on the cookie pieces. Then I drizzled loads more white chocolate on top to stick the whole lot together. It worked but it wasn't how I wanted these brownies to look. That'll teach me to pay more attention.


Run a knife round the outside of the pan to release the brownie and then cut into cubes. They are obviously incredibly rich so a little goes a long, long way! 

A close up. Please imagine some raunchy music playing in the background.


I only had a little nibble because although my diabetes is under control and has almost disappeared, I still didn't want to risk it. Rich took the brownies to work with him (my first baked goods contribution to his new job - eek!). They loved them and they've all gone. Somebody said it was the best brownie they've ever had so I can assure you that these are worth making if you need to make an impression. 


Wednesday, 11 April 2012

Oreo and Brownie Cupcake Pushpops

Apparently the next big thing in the cupcake craze is pushpops. Yep, just like those sweets from the early 90s but with cake and frosting. As soon as I saw these I absolutely HAD to get some so I asked for a tester pack for Christmas. As soon as I tried them out I demanded more for my birthday.


Those are the empty cases. You can wash and re-use them or you can simply discard them as they're pretty cheap. Personally, I like to re-use them because it seems a shame to throw them away. You can buy them from eBay for around £4.50 for 10 with free postage. You can buy larger quantities and the more you get, the cheaper they are. 

I wasn't expecting to do any baking this week but Rich sprung the request on me yesterday as he wants to take some of these on his holiday to give to his friends. The only problem with the short notice is that I'd spent £10 on bacon and halloumi already and brownies are expensive to make. I'm not even remotely ashamed to say that I used a box mix for this recipe. I'm not a baking snob who frowns upon short cuts. Sure, things taste better when made from scratch and you get a bigger sense of satisfaction but there are occasions when time or money mean you have to work to restrictions. Also, if you're baking with kids - not that I would EVER be baking with a child - it can be easier and less messy to use boxed mixes. 

I used a Betty Crocker chocolate fudge brownie mix and I had to add an egg, some water and little bit of oil. 


After mixing, I divided the batter into a 12 slot cupcake tin. You can bake it in a cake pan but you end up with a lot of off cuts and wastage. It also means that every brownie has the nice chewy edge and squishy middle and the cooling time is a lot quicker.


Baking times will depend on your oven and what mix you use but these took about 15 minutes to cook.

While they're baking, you can make the Oreo frosting. I've used 100g of unsalted butter to 200g icing sugar and 3 crushed Oreo cookies. You need to bash the Oreos so you end up with some fine crumbs and also some larger pieces.


When it's all mixed together, it should look something like this. 


Layer the brownie and frosting inside the pushpops. A good ratio is 3 pieces of brownie to 2 layers of frosting. Using a piping bag helps keep the sides of the pop clean but you could use a spoon. The end result will be something like this.


If you don't have a cupcake tin or would prefer to use a pan, you don't need to throw the offcuts away. I made some of these pushpops a while ago to send to a friend and I mixed the offcuts with leftover frosting, rolled into balls, coated in white chocolate and sprinkled with Oreo crumbs. This box of pushpops and bonbons made it all the way from Bournemouth to Manchester in perfect condition so they're great to send to people as gifts. 


You don't need to just use these for cakes. They would be great to use with ice-cream especially with summer coming up. Kids would go crazy for them. 


Tuesday, 10 April 2012

Munchables

I love baking. I'm obsessed with it. I rarely use recipes out of books and prefer to make my own up when it comes to cakes. I have three trusty cake mixes that I know by heart and I pretty much add or change ingredients depending on what I'm experimenting with.

I learned to bake while I was ill to take advantage of the rare occasions I felt normal between dialysis sessions. I was never able to try what I'd cooked as things like chocolate and fruit are frowned upon during renal failure. And anyway, whisper it quietly, I don't like frosting. Shock horror! It's just too sweet for me. As a child if I was given 50p I would always buy crisps instead of a chocolate bar.

As it turns out, I'm a bloody good little baker which was a surprise to everyone given that I was born without the patience gene. If I could, I'd open a cupcake food truck and I'd drive around the south coast selling goodies. I'd call it Sparkles and every cake would have glitter on it.

There are a few items I could not live without when it comes to baking. My giant frosting nozzles and disposable piping bags from Lakeland, my food mixer - especially the balloon whisk attachment, my pallet knife and my silicone bakeware. They have all been life changers.

Anyway, here are a few (a lot) of my favourite bakes.

Brownie burgers, vanilla cake buns and shortbread fries

Chocolate Fantasy Cake 

Raspberry and white chocolate butterfly giant cupcake 

Banoffee cake 

Chocolate Buttons giant cupcake 

Chocolate and cherry cupcake 

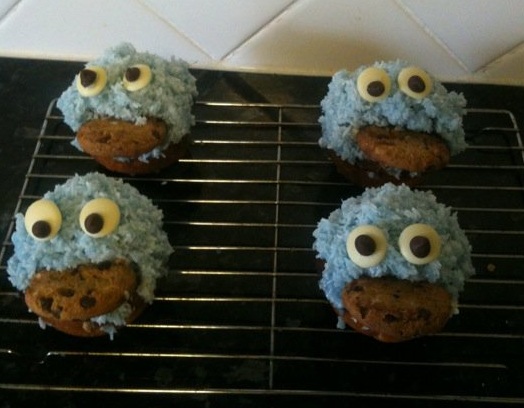
Cookie Monster cupcakes 

Chocolate cake with Baileys frosting, Cadbury Fingers and Malteasers 

Ice-Cream cupcakes 

Lemon cake 

Strawberry and cream macaron 

Neopolitan Cupcake

Oreo giant cupcake 

Vanilla, white chocolate and marshmallow popcorn themed giant cupcake 

Oreo cake pushpops 

S'mores cupcake - chocolate cake, vanilla and chocolate frosting with marshmallow and a mini chocolate digestive biscuit all drizzled with melted chocolate