Showing posts with label Crafting. Show all posts

Monday, 11 February 2013

Valentine's Chocolate Bouquet


Valentine's Chocolate Bouquet


I made this chocolate monstrosity for Rich and it was supposed to be for Valentine's Day but due to the unexpected snow flurry he was working from home this afternoon and he's already seen it. Oops! Still, it means I can do this blog a bit earlier.

We don't usually bother with Valentine's Day and never get each other cards let alone gifts. There's only 4 weeks between mine and Rich's birthdays and Valentine's is right in the middle so it's not really something that we feel the need to celebrate. But I've wanted to make a chocolate bouquet for ages so Valentine's is the perfect excuse. 

To make this bouquet you'll need a few simple pieces of kit.


I used a cylindrical gift box that I got from The Card Shop, wooden garden cane from Wilkinsons and some oasis (usually used by florists) from Hobbycraft. I also used some flower themed cupcake wrappers from Cakes Cookies and Crafts. I had everything apart from the container already lying around the house and if you don't want to have to go to several shops there are other things you can use. Kebab skewers instead of garden cane, polystyrene instead of oasis and the cupcake wrappers are entirely optional. There are a lot more options for the container - vases, gift bags, bowls etc.  

You'll also need some goodies. I picked up some of Rich's favourite chocolates but I also got a marshmallow Me to You bear lolly because I thought it was a nice addition to the Valentine's theme. 
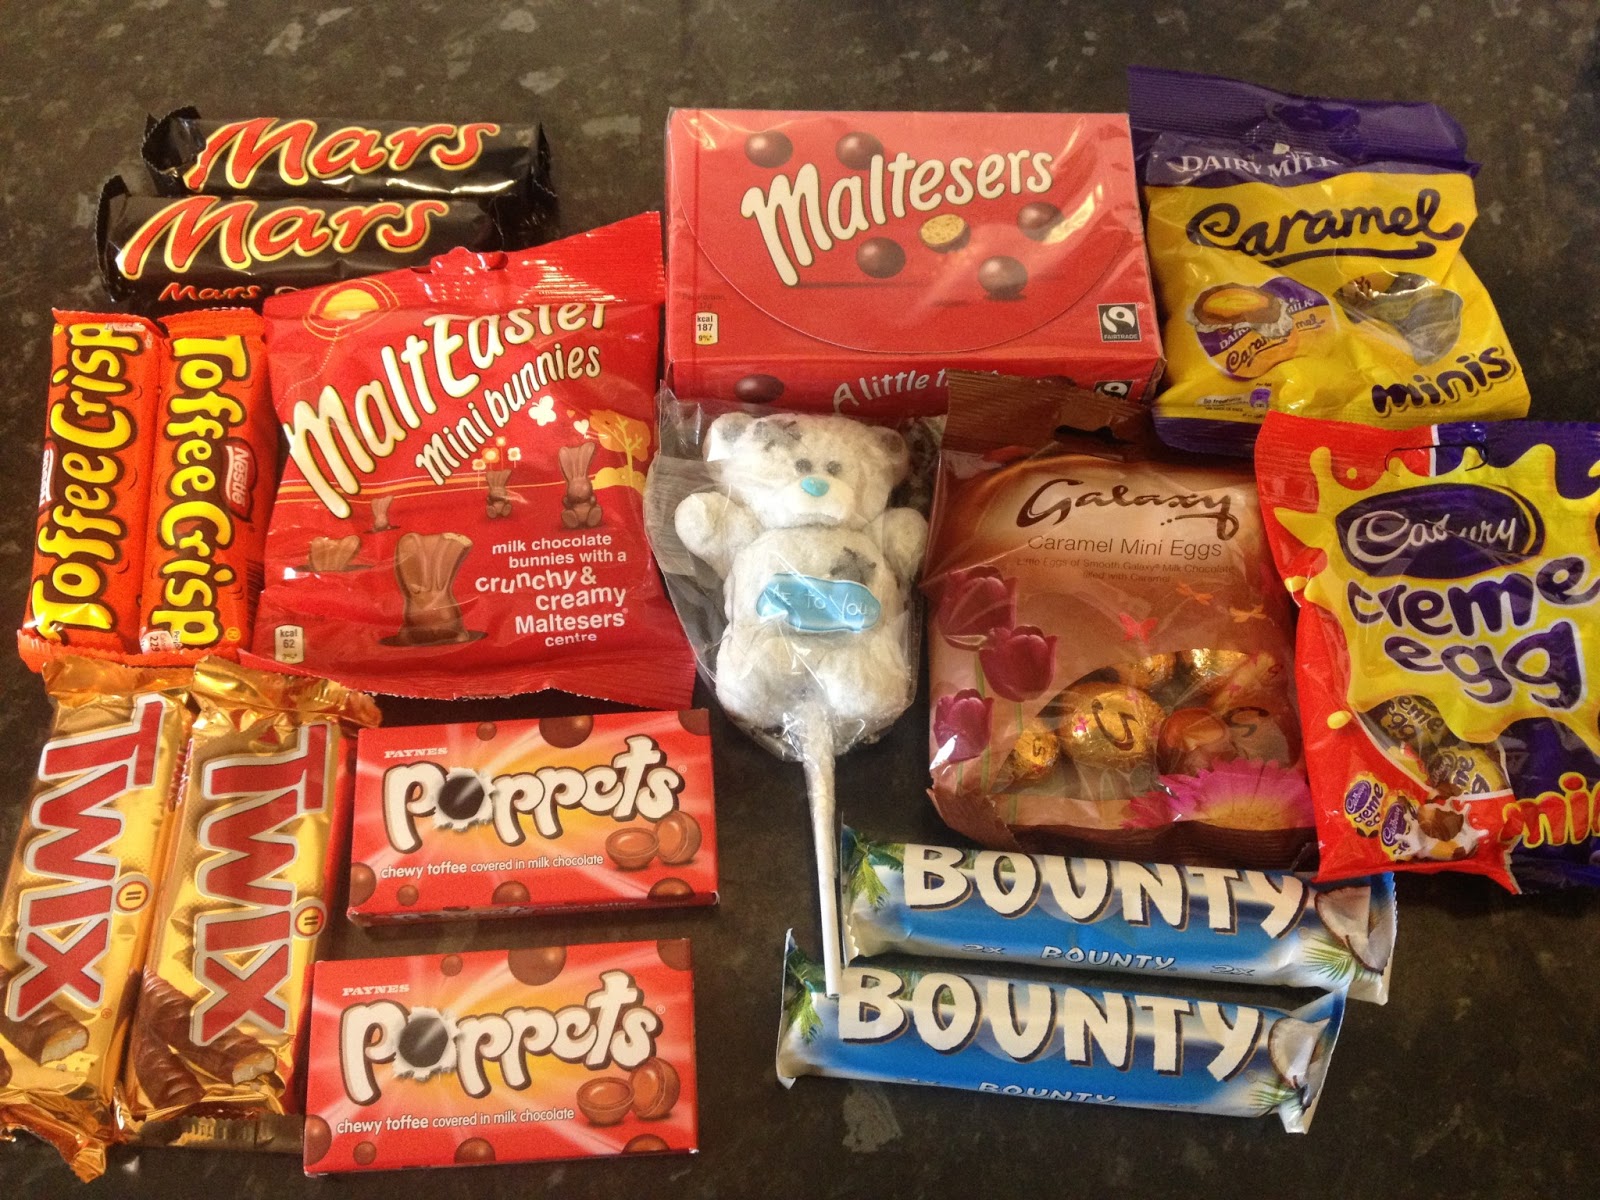

Additional items needed are sellotape and something to cut your rods - I used secateurs. You can also add some decorations, I used a piece of shredded tissue paper to cover up the oasis and these cute heart picks I got from the 99p Store. 


Here comes the science.

Step 1

Put the oasis inside your container. Cover up with shredded tissue paper if desired.

Step 2

Push your rod through a cupcake wrapper like this. If you're not using cupcake wrappers then just skip this step. Pull the wrapper down to the bottom of the rod ready for the next step. 


Step 3

Secure a chocolate bar to the rod using a couple of strips of sellotape on the back. You could use glue but it's a lot messier and if you use tape you can easily remove the chocolate when it's time to eat it. 


Step 4

Pull up the cupcake wrapper so it sits underneath the chocolate bar like petals. 


Step 5

Insert your rods into the oasis. You'll want the chocolates to be at different heights so you can cut your rods down to size. I found it easier to put the rods into the oasis first to judge how much I needed to cut off. Play around with the arrangements until you find something you like. 


Step 6

Keep adding the rest of your chocolate until you're happy with how everything looks. It doesn't matter if you don't use everything you've bought. I ended up with a spare Toffee Crisp and box of Malteasers. They're unlikely to survive the rest of the week. Yum. 

Step 7

Add some decorations. I used the felt and glitter hearts but you can use anything your imagination can think of. Fresh flowers, ribbons, feathers - whatever you like. 


Step 8

You could finish things at step 7 but I do like to go over the top whenever I can so I tied on some bags of chocolates onto the base. Voila - a completed bouquet. 


While you're making this you'll have to be careful that the whole thing doesn't topple over. Keep the rods as short as possible and every time you add a chocolate, put the next one on the opposite side to balance things out. Once it's completed it will be stable, it's just during the creative process you'll need to watch out. This project is incredibly easy and only took me an hour. Chocolate bouquets cost an absolute fortune in the shops, similar ones online with the same amount of sweets are over £30 and that's without postage. And, perhaps best of all, there's no way one person can eat that much chocolate on their own so they'll have to share - huzzah!

Friday, 7 December 2012

Candy Cane Vodka

Candy Cane Vodka


I'm going to a party on Christmas Eve and I wanted to take something new. Usually when I attend parties hosted by this particular friend I make vodka jellies but they're more of a summer treat than a festive one. Skittles vodka has been doing the rounds for a long time now so I figured that if that works, a candy cane one would too. 

The ingredients and method couldn't be more simple. You can make it in just a few minutes.


To make this festive tipple you will need vodka, candy canes and bottles. It's worth using a good quality vodka because this won't be something you drink with a mixer, it will be a shot. I'm using peppermint candy canes from Asda which cost £1 for 12, bottles from Lakeland which cost £2.99 each and hold 250ml and Grey Goose vodka. I don't how much the vodka cost because it was purchased from a duty free shop and was a gift. 


I decided to use one candy cane for each 250ml bottle. I put each one in a separate sandwich bag so I could ensure each bottle got exactly the same amount.


Bash each cane a few times to crush it.


Make sure the candy cane is really finely crushed so it dissolves easily in the vodka. After I'd bashed it a few times I rolled over it with the rolling pin to grind it up. You could also use a food processor to do this.


Poor the contents of each bag into a bottle.


Then pour in the vodka.


Give each bottle a quick shake to mix everything and you're done! 

Not all the crushed cane will dissolve straight away but that's fine, give it a couple of days and it will soon disappear. I checked on mine a couple of hours after I'd made it everything had mixed in beautifully. You can give it a taste and add more candy canes if you want. I think I prefer the square bottle as the vodka turns a lovely pale pink colour and this bottle shows it off more as the swing top has a slightly green tint to the glass. For presentation you can tie a candy cane onto the bottle with a ribbon or you could tie on a tag or even write directly on the bottle with a marker pen. This is sure to go down a treat with anyone you share it with and it makes a great home made gift. Next year everyone I know is getting sweetie flavoured vodka for their birthdays!


Thursday, 15 November 2012

Recycling Beauty Boxes into Vintage Keepsakes

I've been receiving She Said Beauty boxes since April and I thought it would be a shame to throw the packaging away so I've been keeping them safe for Christmas. I've been decorating them using vintage images I've found online and the results have been wonderful. Each one is unique as no two are alike.


My first step was to find the pictures. I did an online image search of "vintage Christmas" and "Victorian Christmas". I pasted them all into a Publisher document, converted it to a PDF and printed them off. 


The second step was to cut the images out. There were 10 sheets of pictures for each box and to stop me getting in a muddle I kept the cut outs for each box in a plastic wallet.


When it was time to start decorating I gathered my small list of supplies; pva glue, paint brush, images and the box. 


I found it helpful to sort the pictures into sizes as it made things easier when decorating the boxes. I also put images I particularly liked at the top of the pile so they'd definitely be used.


The decorating was really simple. Using the brush I painted on some glue and put an image on top. I then went over the image with additional glue to smooth it out and get rid of any lumps and bumps.


Ensure your images go right into the corners and edges of the box.


I found it helpful for the images to slightly overlap in places and to go over the edges of the box, this ensures there are no bits that don't get covered and it also means the box has an even finish.


Don't worry if you get some wrinkles, you can smooth them out with additional glue when the first layer has dried slightly.


Getting a good layout can be tricky at times and I found it helpful to put the images on without any glue to see how they look next to each other and then I'd take a photo so I could refer to it.


Keep on gluing until you've covered the whole box. You'll have to take breaks so the glue can dry in places before moving on to the various sides of the box but eventually you'll have a box completely covered in vintage images.


We know how many goodies She Said Beauty pack into the boxes each month so you can fit a lot inside. I'm using them as Christmas presents that I'll be filling with all kinds of surprises. It's better than going into a shop and spending money on massed produced packaging. While I'm excitedly counting down the days to Christmas when I can give them to my friends I'm using them to store my ribbons, gift tags and other bits and pieces that I use for wrapping gifts.


In terms of monetary cost, these boxes are incredibly thrifty for something that is one of a kind. The glue was £1.50 and will be more than enough to do all 6 of the boxes I'm making, the paintbrush was £1 and the boxes were free. I printed the images at home but to try and put a cost on it, where I work charges 3 pence for each page of colour printing and there are 10 pages so that works out as only 30 pence per box. In total it will have cost me £4.30 for all 6 boxes - less than a pound each! Even if they were triple the cost it would still be worth it and your friends who receive one will know that you've taken the time and effort to hand craft them a one-off present.