Showing posts with label cooking. Show all posts

Wednesday, 18 September 2013

Say NO to food snobbery

I will be the first to admit that I have been rather unkind in the past about other peoples cooking habits. One particular incident that springs to mind was someone posting a Facebook status about how they'd made their own crumble topping and that they were really proud not to have used a packet. I made a sarcastic comment about rubbing together flour, butter and sugar being easier than opening a packet and then I headed over to the safety of Twitter to cast disparaging comments about people who open a jar of pasta sauce and then mistakenly claim to have cooked from scratch.

It was cruel and uncalled for and from now on I'm making a stand. I will be saying NO to food snobbery. It's gone too far and people are trying to outdo each other at every turn. From gloating over finding a grocer who sells vegetables harvested under the shadow of the third phase of the moon to only buying meat from a butcher who has personally hand reared each animal from birth on a diet of classical musical and unicorn tears. Food snobbery is ruddy everywhere, it's even being used against something as beautiful as chocolate.

"I love chocolate"
"Me too"
"It has to be the proper stuff though"
"Oh absolutely, 70% cocoa for sure"
"Only 70%? I have to have 85% it really makes a difference"
"I've recently been having 90% actually, it's a shame you've not tried it"
"The 90% stuff is ok but if you really want to properly experience chocolate you need to get the 99% pure cacao bar"
"Well funny you should say that, I've been importing cocoa beans and having them raw. You can't beat 100%"

When did it become such a crime to enjoy a bit of Diary Milk or a Twix?

And as for pastry, heaven forbid you should use pre-made. Whenever you watch Come Dine With Me there's always a sanctimonious trout questioning the pastry and down marking if it's not home made. We all know that pastry is easy to make; mix ingredients, rest, roll, done. I've even been to cookery school to learn how to make it but that doesn't mean I'm never going to cheat with a packet especially when it comes to puff pastry. The best restaurants in the world buy their puff pastry ready made and if it's good enough for them then it's certainly good enough for me. It's the gloating that gets me riled up; "Well of course it's home made pastry" and then they act appalled at the idea of someone even suggesting that they would have even allowed a packet of pastry into their house let alone having used it. You made some pastry. Well done. Give yourself a pat on the back.

Don't get me wrong, despite my stand against food snobbery there are certain things I will be unwavering on. I only buy free range eggs and this is something I will never change. I always buy British or Irish meat unless the option isn't there - occasionally I've had to buy Danish bacon and some things are country/region specific such as Parma ham. I know there are British alternatives to Parma ham but unless they have it the supermarket, there isn't a charcuterie for miles and miles so it's not an option.

That point brings me to another bone of contention for food snobs across the land *dramatic music* SUPERMARKETS. Some people seem to be of the opinion that because they avoid supermarkets like the plague they are superior to us lower mortals who visit for our weekly shop. Obviously it's great if you happen to live within a stones throw of a greengrocer, butcher, baker and candlestick maker but most of us don't. I live less than a 5 minute walk from a twice weekly market which features not one but two grocer stalls but I still don't use them. They only sell by the bowl rather than in single units and I simply have no need for an entire bowlful of onions or oranges. I only cook for myself and Rich so if I bought everything by the bowl I'd end up throwing an awful lot away or we'd get bored of eating the same stuff every day. If you've got the time to visit several different independent shops throughout the week then good for you, enjoy it. But there are plenty of people who don't have that option. It may have been a standard way of life a few years ago but with the addition of fridge freezers to every home coupled with microwaves, longer working hours and longer commutes, it's not really practical anymore.

I do believe that home-made tastes better not to mention the sense of achievement and pride you get from starting with lots of separate items and finishing up with something wonderful and delicious. However, if someone wants to buy a jar of ready made pasta sauce for £1 instead of buying some tomatoes, pasata, onion, peppers, garlic and herbs (for obviously a lot more than £1) and stand over a hot stove for ages after a hard day at work, with the kids running around, the dog needing a walk, the house needing a tidy and a mountain of ironing then who am I to judge. Sometimes you just want dinner on the table and if a packet helps you get through the day then it can only be a good thing.

Sunday, 28 October 2012

Blackberry Pastilles


Blackberry Pastilles

I've adapted this recipe from one I found in the Home Made Sweet Shop book. I had to make a few changes because I didn't have liquid pectin or liquid glucose and I wasn't convinced the recommended 800g of blackberries would give me enough juice. I've also used cup measurements rather than grams because the battery in my scales helpfully decided to die without warning. 

The ingredients you will need are as follows:

1,050g blackberries (I used 3 packs of 350g frozen blackberries from Asda)
2 1/2 cups preserving sugar (I used Silverspoon)
5 tblsp golden syrup (the original recipe asked for liquid glucose)
150ml water
1 tsp cream of tartar
1 sachet powdered pectin (I used Silverspoon again)
2 tsp lemon juice
100g granulated sugar for coating

The equipment you will need:

Clingfilm
15x15cm tin (I used my standard square brownie pan)
Sugar Thermometer 
Large saucepan
Two large glass bowls
Seive
Spatula
Large tupperware container
Chopping board
Sharp knife

Here comes the science.

1. Line your tin with clingfilm. I sprayed a few squirts of Frylight between the tin and film to help it stick.
 
2. Put your blackberries in the pan and heat gently for a few minutes without stirring. This will release the juices.

3. Put your sieve over a glass bowl and press the blackberries through the sieve so you get all the juice and can discard the pulp. You'll have to do this is stages because of the volume of berries.

4. Eventually you'll be left with a bowl full of juice. The original recipe said you should have 2 generous cups of puree from 800g of blackberries but I used 1,050g of blackberries to get the full 2 cups. It was more of a juice than a puree too, it was completely liquid. Mix in 1/4 cup of the preserving sugar and set aside until later.


5. Wash and dry your saucepan. Add the water, golden syrup, cream of tartar and the rest of the preserving sugar. Give it a quick mix. Try to ignore the resemblance to yellow snow (teehee!)


6. Put the sugar mixture onto a very low heat and stir gently until all the sugar has dissolved. This was the first time I've ever used preserving sugar and I was surprised at how long it took to fully dissolve. Once your mixture is no longer grainy, stop stirring completely and turn the heat up to medium. As soon as you start to see bubbles around the edges turn the heat up to high and boil until it reaches 130 degrees C. Do not stir!


7. This step runs almost concurrently to step 6. While you're boiling the sugar and waiting for it to reach 130 degrees C you can stir your sachet of pectin into the blackberry juice. I added my whole sachet at once which ended up being a nightmare as the powder clumped together forming hard to dissolve lumps. I almost missed the correct boiling point because I was distracted for so long. Next time I will add a little at a time and sprinkle it over the surface. I'll also be making a trip to Lakeland to buy some of their liquid pectin!


8. As soon as your sugar mixture is at 130 degrees C you can pour in your juice/pectin mix. Stir gently to combine and then leave it to boil back up to 103 degrees C. Now add the 2 tsps of lemon juice and continue boiling until you get to 106 degrees C. Then give it a little stir.


9. At this point the original recipe said to transfer it straight to your clingfilmed tin but I had a few lumps floating on the top of the mixture so I poured it through a sieve into a clean glass bowl. I'm glad I did this because as you can see below, the remnants left in the sieve are not pleasant!


10. Pour your sieved mixture into your tin and leave to set uncovered overnight. I noticed that as soon as I poured it into the tin the top started to solidify. 


11. Once your pastille block has set you can lift it up using the clingfilm and transfer it to a chopping board. Using a very sharp knife you can start to carve it into squares. Coat each square with the granulated sugar. Ensure your fingers are also coated in sugar as this will stop the pastilles sticking to you and breaking apart. 


12. Keep going.


13. Eventually you'll have a whole chopping board covered in sugar coated pastilles. 


14. Transfer your pastilles to an air tight container. I lined the bottom of the tub with clingfilm just to be on the safe side but I don't think this was actually necessary. I stacked half of the pastilles in a small glass bowl to take a photo and none of them stuck to each other. 


This recipe made 56 dice sized cubes. My tin has fluted sides and I had to cut the edges off to get proper cubes so if you didn't have to do that you could easily get another 7 squares. The original recipes suggests either cutting into squares or using a small cutter to create shapes such as hearts or stars. Personally I wouldn't like to use a cutter as the uncoated pastille is incredibly sticky and I think the shapes would break apart. 

I wouldn't say these pastilles were expensive but they weren't cheap either as the blackberries alone were £6 although if I'd been more prepared I could have picked some from the hedgerows. 

The pastilles are delicious but incredibly rich. You wouldn't be able to eat more than 2 in a row but that's not a bad thing as it means there are more to share around. They're wonderfully soft and the sugar gives them a bit of texture. They remind of those York Fruits but a bit softer and with a more intense flavour. 

You could easily adapt this recipe for any other berries as all you need is two generous cups of juice. I will absolutely be making strawberry versions next summer. 

Friday, 20 April 2012

Stromboli

After watching the Hairy Bikers make one of these on Tuesday I absolutely HAD to give it a go. It's probably one of the worst things I could make given that white flour hates me and Rich is lactose intolerant so shouldn't eat cheese. But hey, it's Friday and we've got all weekend to be ill. And anyway, it was SO worth it.

The original recipe is HERE but I changed it up a bit because I'm lazy.

I copied their dough method and recipe pretty much exactly apart from using garlic infused olive oil instead of the plain stuff.

Neither Rich or I like chunky tomato sauces so I used normal pasata straight out of the jar. It's also because I'm lazy and wanted to watch something awful on the telly. A teaspoon each of Very Lazy chopped garlic and chilli were also added to the pasata.

The fillings we had were prosciutto ham, smoked bacon, sausage, salami and three different kinds of cheese. At the time of writing the posh prosciutto ham is half price in Sainsbury's and the pre-cooked smoked bacon strips are £1.75 and I only used a quarter of a packet. I cooked the sausages last night and pulled them apart into tiny pieces. The cheeses were grated mozzarella, grated mild cheddar and reduced fat buffalo mozzarella although quite frankly, trying to reduce the calories on a recipe like this is a futile mission.

After I stretched the dough and skillfully and artistically placed scattered the fillings I tucked the edges in and rolled it up which was actually easier than I had anticipated.


My rolling could have been neater but it was my first attempt so I'm not going to be too hard on myself. After a second proving and 30 minutes in the oven the meaty beast emerged golden and glorious.


We had ours with a side of baby spinach drizzled with a bit of garlic oil.


There was more than enough to feed myself, Rich and my mum as well as the birds in the garden who have been given the ends of the Stromboli to feast on over the weekend although poor Monty was unsuccessful in his begging attempts.

Overall it was love at first bite but I must have done something wrong. When I watched the Hairy Bikers make theirs, they used only ham, mozzarella and basil - around half what I used in terms of volume but even with the mountains of fillings we all felt that they got a bit lost in all the bread. I used 4 whole sausages, 4 torn slices of ham, several strips of bacon and an entire mozzarella ball not to mention the grated cheese and slices of salami. It looked like so much before I rolled it up and I was worried I'd over done it but I think you could easily double that!

I'd still rate it a solid 8 out of 10 and it's something I will definitely be making again in the future. That's if we both the survive the weekend ahead without dying from our food intolerences. Oops. 


Wednesday, 11 April 2012

Halloumi and bacon burgers

I love putting halloumi and bacon together. I know it sounds like a salty nightmare but it really is delicious.

Halloumi has to be one of my top ten foods. My favourite way of preparing it is to drizzle it with garlic infused olive oil and either griddle it or, even better, barbeque it. I have introduced so many of my friends to this gorgeous yet bizarre cheese and not one of them has ever said they don't like it. I even sent a packet across the Atlantic to a pal in America who had never heard of it and couldn't find anywhere near her that sold it. You can get it in any supermarket now in both normal and light and Tesco do an amazing chilli version. Asda also do a chilli one but I'm not keen on it. I've not tried the cracked black pepper one but I'm sure it would be superb.

I made these a couple of weeks ago and had loads of requests for the recipe so I figured I'd put it in writing and bring joy to your lives. We also had them for dinner tonight so while the memory is fresh, I'll type up the details.

Unless I'm baking, I don't tend to use specific measurements. For each burger I did two rashers of bacon and two slices of halloumi. A whole packet of mince is enough to make quite a few burgers so it's a good idea to either get some friends round or freeze the burgers you don't use.

Here are the basic ingredients.


I wouldn't usually have Marks and Spencer halloumi and bacon but I was in their Simply Food shop in Westbourne yesterday and figured that since Rich is going on holiday tomorrow, I'd get the good stuff for a change. 

Obviously you need a few more items, buns would be helpful as would salad and some ketchup.

This is how you want the bacon to look. If you can't snap it in half, it's not crispy enough. There should be absolutely no movement in it whatsoever. I get so upset when I order something in a restaurant that specifies "crispy bacon" and when it arrives I'm presented with greasy and floppy rashers with chewy fat. Yuck. I cook the bacon before I do anything else because that gives it plenty of time to crisp up and for the grease to dry off. It also means you can cook the burgers in bacon fat. 


The method

Finely chop about a third of the halloumi and mix it in with the beef mince. Add an egg to act as a binding agent along with with some seasoning but go easy on the salt because the cheese and bacon will take care of that.
Shape into burgers using your hands or with a fancy machine if you happen to have one. I don't and the old fashioned method is good enough for me. Make the burgers as big or as little as you want.
Start to cook the burgers in the left over bacon grease but don't cook them all the way through. Nobody likes a greasy burger so I finish mine off in the oven by putting them on a wire rack above a baking tray. The excess fat will drip off onto the tray. Ideally it would be great to cook these on a bbq but this is Great Britain and it's not quite the weather for it just yet. 
Cooking times will vary depending on how big you made your burgers and how you like your meat. 
While your burgers are in the oven you can prepare the halloumi. Cut two slices per burger and either griddle or fry. If you're planning on cooking a lot of burgers you might need two packets of halloumi so you don't end up with slices that are really thin.
Cut some buns in half and add the salad of your choice. I've put the lettuce and onion on the base of the bun and the bacon and halloumi on the top half.
Add the burgers and you're done!


I've served these on wholemeal buns because white flour doesn't like me very much which is a shame because I'm rather fond of it. I also did some garlic cream potatoes but you could have anything you like - chips, more salad or even couscous. 

This is definitely not a dish for anyone trying to lose weight but it is fabulous for a treat. As for me, I am currently trying to lose weight so it'll be basic rations for me tomorrow!


Tuesday, 10 April 2012

Munchables

I love baking. I'm obsessed with it. I rarely use recipes out of books and prefer to make my own up when it comes to cakes. I have three trusty cake mixes that I know by heart and I pretty much add or change ingredients depending on what I'm experimenting with.

I learned to bake while I was ill to take advantage of the rare occasions I felt normal between dialysis sessions. I was never able to try what I'd cooked as things like chocolate and fruit are frowned upon during renal failure. And anyway, whisper it quietly, I don't like frosting. Shock horror! It's just too sweet for me. As a child if I was given 50p I would always buy crisps instead of a chocolate bar.

As it turns out, I'm a bloody good little baker which was a surprise to everyone given that I was born without the patience gene. If I could, I'd open a cupcake food truck and I'd drive around the south coast selling goodies. I'd call it Sparkles and every cake would have glitter on it.

There are a few items I could not live without when it comes to baking. My giant frosting nozzles and disposable piping bags from Lakeland, my food mixer - especially the balloon whisk attachment, my pallet knife and my silicone bakeware. They have all been life changers.

Anyway, here are a few (a lot) of my favourite bakes.

Brownie burgers, vanilla cake buns and shortbread fries

Chocolate Fantasy Cake 

Raspberry and white chocolate butterfly giant cupcake 

Banoffee cake 

Chocolate Buttons giant cupcake 

Chocolate and cherry cupcake 

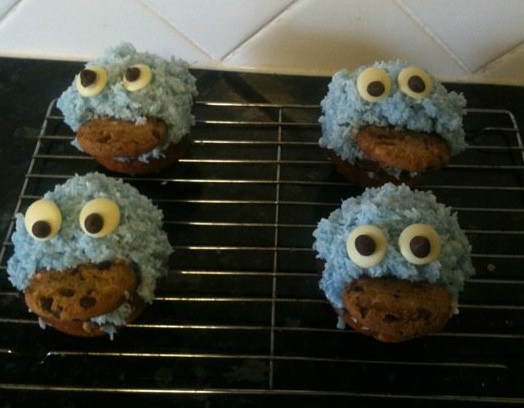
Cookie Monster cupcakes 

Chocolate cake with Baileys frosting, Cadbury Fingers and Malteasers 

Ice-Cream cupcakes 

Lemon cake 

Strawberry and cream macaron 

Neopolitan Cupcake

Oreo giant cupcake 

Vanilla, white chocolate and marshmallow popcorn themed giant cupcake 

Oreo cake pushpops 

S'mores cupcake - chocolate cake, vanilla and chocolate frosting with marshmallow and a mini chocolate digestive biscuit all drizzled with melted chocolate


Monday, 9 April 2012

French Apple Tart - Tarte Au Pommes Francais

I recently went to cookery school for the first time. It was a bit of a bargain because I got the deal from Groupon so it was only £30 instead of £85. I enjoyed the class so much I immediately booked onto a full priced one. In May I'll be learning how to make rum truffles and white chocolates with mango centres. Yum.

The course was at Brockenhurst College and it was worth going just for what I witnessed on the drive there. I saw a pub with a sign outside banning "grannies in bikinis" and a woman being rescued by an ambulance after getting her foot stuck in a cattle grid.

Anyway, I chose to partake in the pastry class as I'm guilty of always using shop bought stuff. I know it's easy to make but I never got round to learning. The chef explained that he we would be cooking an apple tart that he used to cook when he was head chef at the Ritz - ooh, fancy.

This was the final result:


Not bad for a beginner! The apples were prepared in a totally different way than I'm used to. The chef told us putting apples in sugar and water is a crime and did go into the science of why it was wrong but I've forgotten it now. I found my once superb memory went into decline when I was on dialysis and it hasn't recovered just yet. Or perhaps I'm just getting old. *le cry*

The recipe for this glorious tarte is as follows:

Ingredients

250g plain flour
120g butter (for the pastry)
25g butter (for the apple filling)
60g castor sugar
1 egg
5 large Bramley apples
Jar of apricot jam

Put the 25g of butter into a pan and melt it until it just starts to turn brown.
Peel, core and quarter the apples. Cut them into slices about half a centimetre thick and add them to the pan of butter. You'll have to work FAST because you don't want the apples going a funny colour. 
Cook the apples until they start to resemble lumpy mashed potatoes. Do not cook them until it's smooth like baby food!
When it's ready, spread it out on a cool flat surface eg a baking tray. Try and make it as flat as possible to assist with the cooling.

Now you can start on the pastry.
Lightly grease a baking tray and an 8 inch flan ring. This recipe didn't use a conventional tart case, it was just a ring on a baking tray.
Put the flour, 120g butter and sugar into a bowl and rub together until resembling bread crumbs. 
Then add the egg and mix with your hands until it is all blended together and feels something like marzipan in texture.
Flour your work surface and roll out the pastry using light strokes. That's right folks, there is no pastry refrigeration in this recipe!! 
Using the rolling pin lift the pastry and place it over the flan ring. Push the pastry all around the bottom of the ring to make a pastry "dish". 
Roll the rolling pin across the top of the pastry to take off the excess. You can then use your thumb and index figure to crimp the pastry into a pretty shape. 

When the apple mixture is completely cooled, pour it into the pastry case. Yes, another surprise - no blind baking.
Spread it out as flat as possible so it cooks evenly. 
Take the final Bramley apple and peel, core and quarter it. Then cut into thin slices you can spread over the top of the tart. 
Cook in the oven at 180degrees for 20-25 minutes.

To glaze the tart, melt down the apricot jam and bring to the boil. Simmer for 10 minutes before generously brushing it over the top of the tart. Remember, there is no sugar in the apple mixture so this will add sweetness.

This was how my pastry case looked after all the crimping. The bottom of the pastry is in direct contact with the baking tray which is why you don't need to blind bake it. 


And here is the tart before it was baked. 


I loved doing this course because all the usual rules about pastry like chilling it before use and blind baking were completely ignored and the tarte didn't suffer for it.

You'll have a bit of pastry left over and you can add some chocolate chips or nuts and make some biscuits. Waste not want not!

I made the tarte again for Easter dessert but I used a 10 inch metal flan dish with a base from Lakeland. I used the exact same recipe but should have added another apple to the filling because it was a bit thin due to the extra couple of inches. I didn't chill the pastry and I didn't blind bake it and I was really pleased with the results. If you were going to use a ceramic or glass dish then you would need to blind bake it because the heat can't get to the base properly. I may have forgotten the science behind not soaking apples in water but I do remember that bit! 

Here's the one I made at the weekend at home without all the fancy pants equipment at cookery school *smug face*